A Step-by-Step Afternoon Workshop

You Can Press "Boutique" Tote Bags With Flowers From Your Own Backyard.

No sewing required. You start with a plain cotton tote and press flowers into it.

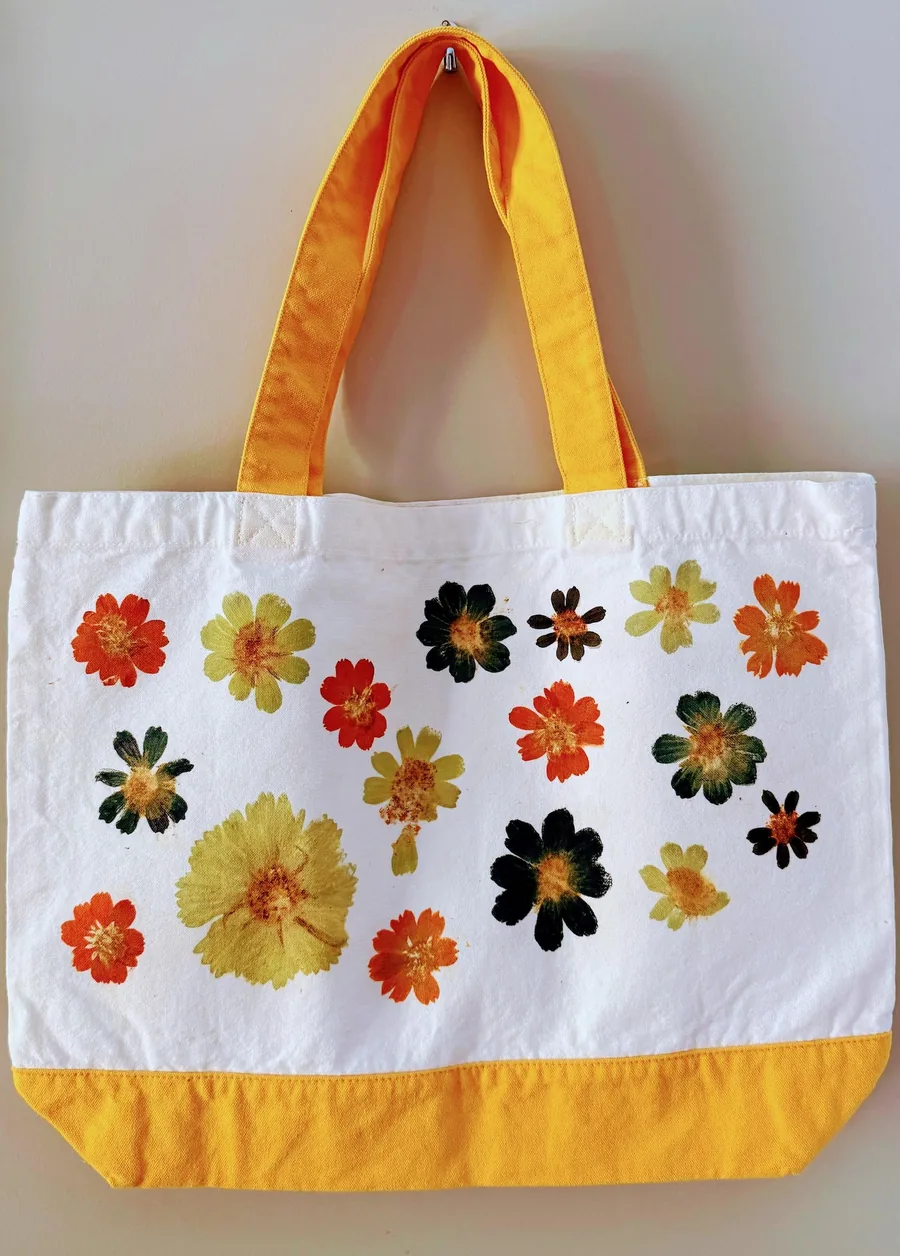
Finished pound-dyed tote bag hanging on a wall hook: white canvas with marigold-yellow handles and base, covered in pressed orange, chartreuse, and deep green cosmos prints

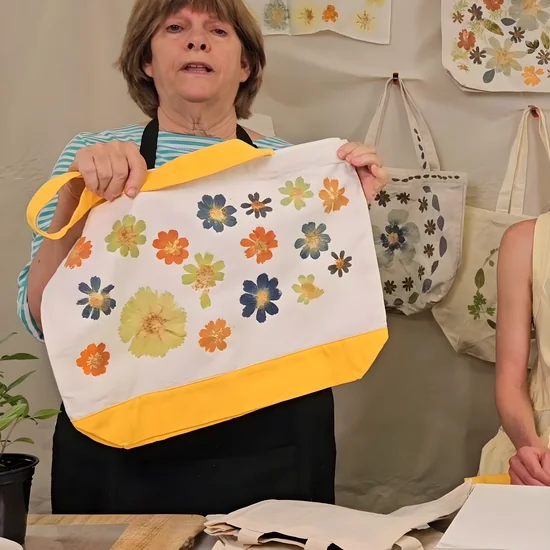
Imagine walking into the farmers market with a tote bag no store has ever sold. White canvas scattered with rust-orange and deep green cosmos and one palm-sized chartreuse bloom, every single print made by a real flower you hammered into the cloth yourself. No two bags on earth like yours.

Imagine someone stopping you to ask where you got it. "I made it," you say. "With a hammer." They laugh, then they look closer and realize you are serious. The petal edges are all there. The leaf veins are all there. That is a real flower pressed into the fabric, and they have never seen anything like it.

Imagine doing it again next weekend for almost nothing. A two-pack of totes costs about ten dollars, and the flowers are already growing in your yard, or sitting in the grocery store herb aisle for a couple of bucks. Different plants, different bag, same hammer.

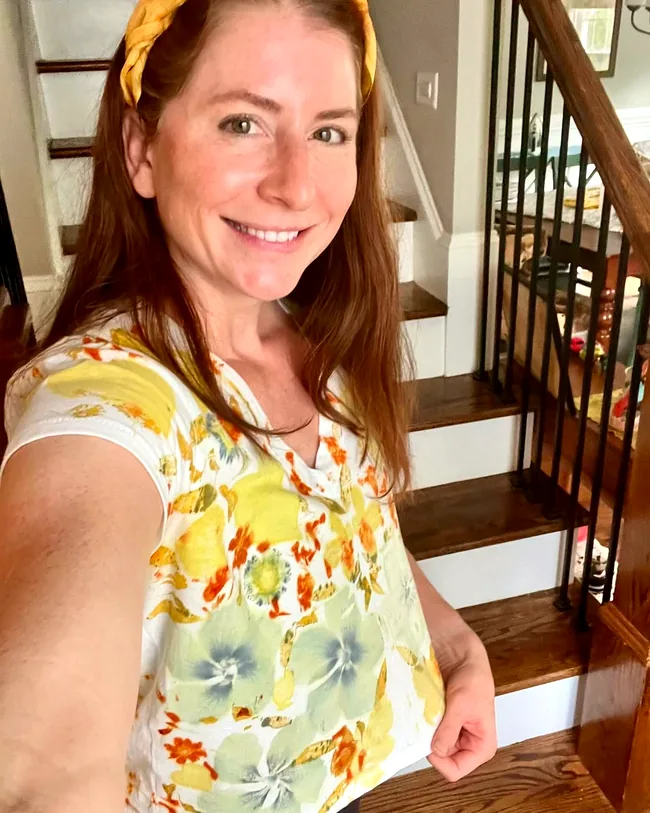
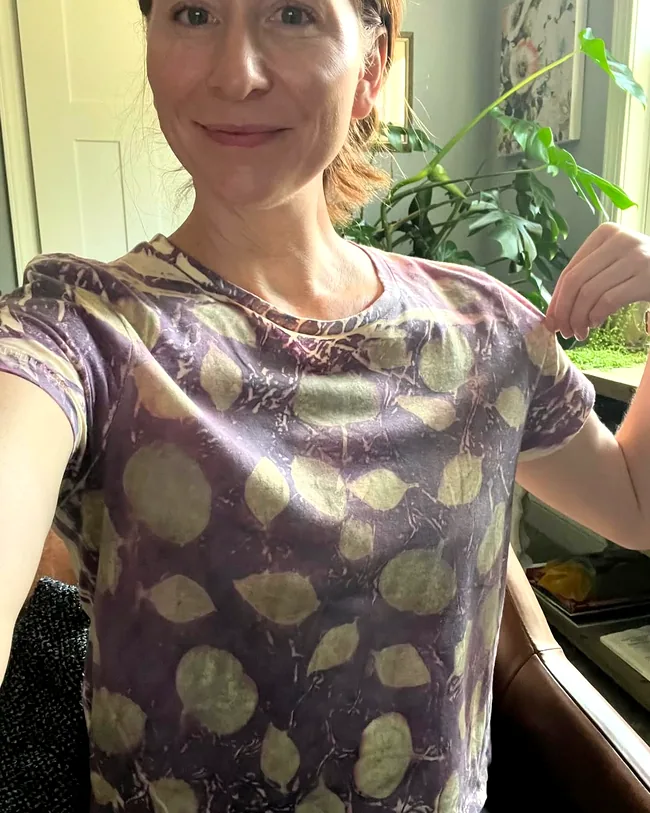
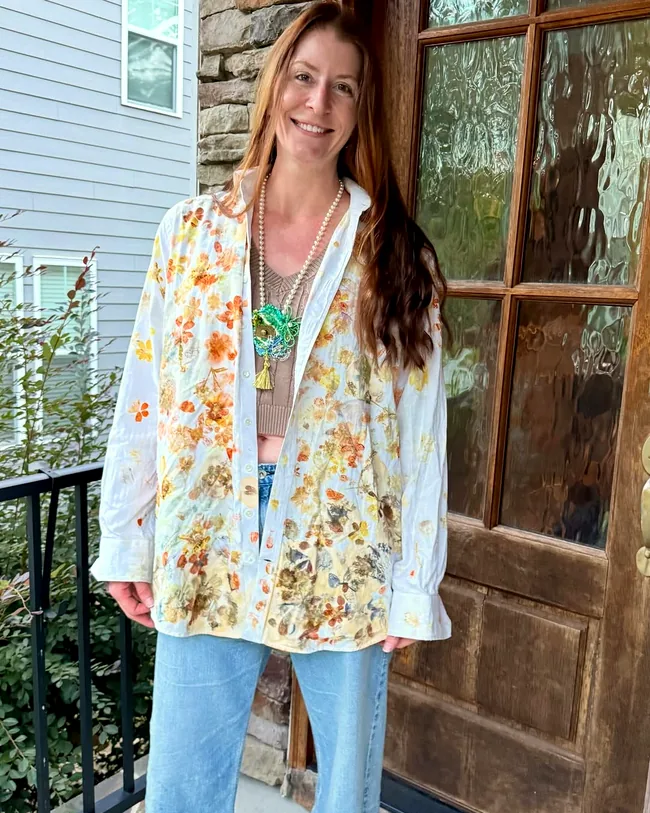
The tote is just your first canvas. The same technique works on plain tees, button-down shirts, silk scarves, and sundresses. You start on a tote bag because it's cheap and forgiving while you learn. Then nothing in your closet is safe:

Smiling maker in a white tee printed with yellow and orange botanicals, wearing a marigold-dyed yellow headband

A favorite white tee

Maker in a plum-purple tee covered all over in soft green leaf prints made from real leaves

A leaf-printed tee

Maker on a front porch in a white button-down shirt covered in orange and gold flower prints

A whole button-down

All real pieces, all real plant color.

Start on a Tote Bag. Graduate to Everything Else.

This workshop starts you on a plain cotton tote bag on purpose. It is the perfect first canvas:

Get your practice swings in on a five dollar bag. By the time you pick up a silk scarf or a sundress, your hammer will already know what it's doing.

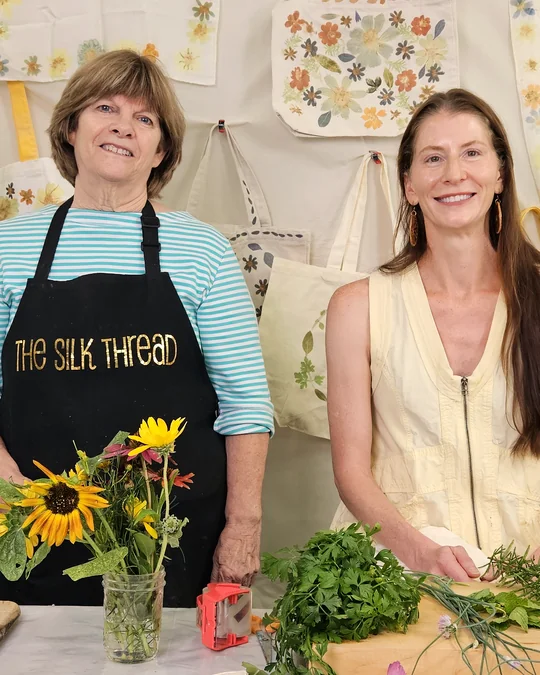
Theresa Brown and Kristi Thompson smiling behind a table of fresh flowers and herbs, with their printed totes hanging behind them

Theresa Brown & Kristi Thompson

Theresa Brown is a longtime ecoprinter and fiber artist. She has spent years pressing plant color into fabric in just about every way it can be done, and she teaches this workshop the way she works at her own table: relaxed and completely unfussy.

Kristi Thompson picked up flower pounding a couple of years ago as a complete beginner, and it took hold fast. Now she is the one running the experiments: discovering that dill prints like green lace, that grocery store herbs keep her printing straight through winter, and texting Theresa photos every time a new plant surprises her.

Together they cover both ends of the craft: a seasoned fiber artist who knows why every step matters, and a recent beginner who still remembers what confused her on day one. Kristi's daughter Raina assists on camera and supplies the proper Japanese pronunciation of tataki-zome.

Introducing The Japanese Pound Dyeing Ecoprint Workshop

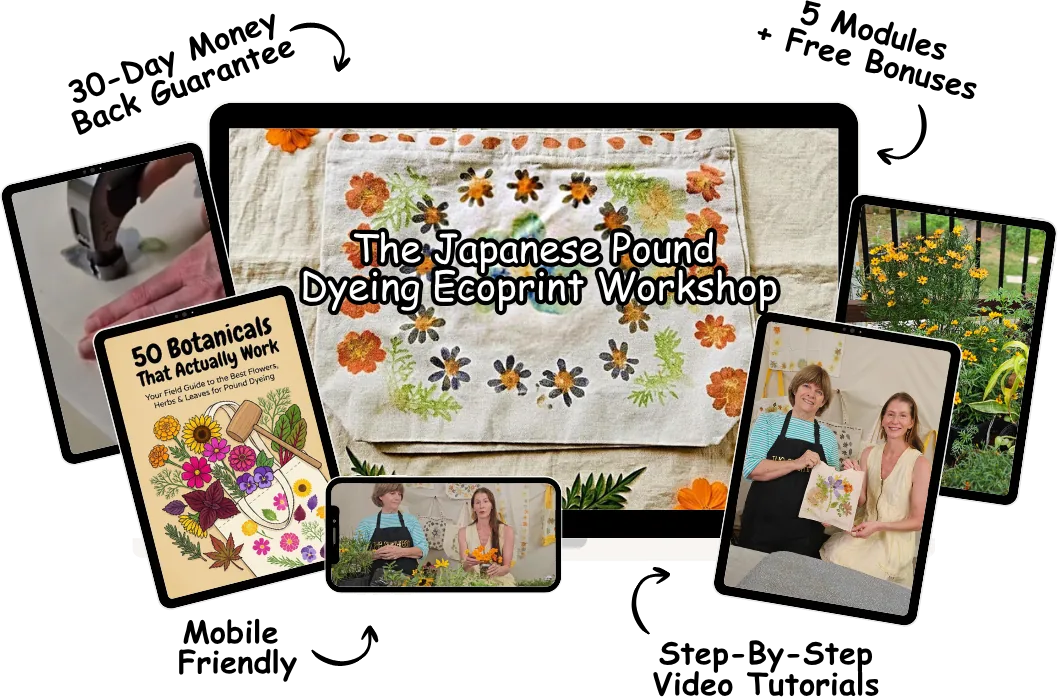
The Japanese Pound Dyeing Ecoprint Workshop shown across devices: a laptop playing the workshop over the finished flower-printed tote, tablets with the hammering close-up and the 50 Botanicals field guide, and a phone with Theresa and Kristi at the flower table

The Japanese Pound Dyeing Ecoprint Workshop is a complete, step-by-step video course that takes you from a blank cotton tote to your own botanical-printed bag in a single afternoon. Everything happens on camera, in real time, and no step gets glossed over.

You'll set up a simple pounding station on an old cutting board. You'll choose flowers and herbs that actually print (and skip the pretty ones that disappoint). You'll lay everything vein-side down, tape it flat, and hammer the color straight into the cloth. Then you'll peel away the spent petals, heat-set your prints with a regular clothing iron, and give the bag a short cure so it can go through the washing machine.

And once your first bag is done, the same swing works on scarves, shirts, and sundress hems. The hammering never has to be relearned; what changes is whatever you clip from the yard that morning.

What You'll Learn

Five video lessons plus a bonus, all of it filmed at the worktable.

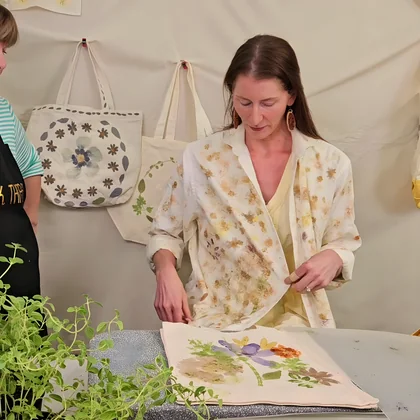
Module 1: Theresa holding up a finished tote printed with blue, orange, and chartreuse cosmos in front of the wall of printed bags

Module 1

Introduction to Pound Dyeing

Meet tataki-zome, the Japanese art of flower pounding, and see the before-and-after you'll create: a plain cotton tote transformed into a one-of-a-kind printed bag in an afternoon.

  • Why there's no dye pot and nothing to mix: the color goes straight from the plant into the cloth
  • The before-and-after tour: blank totes, first-afternoon bags, and the petal designs and layered pieces you can grow into
  • Why you're never limited to summer flowers: grocery store herbs keep you printing all year round
  • The honest heads-up about noise (this is hammering, after all) and the two easy ways to keep it neighbor-friendly
  • Includes the printable supplies checklist, so you can gather everything in one trip
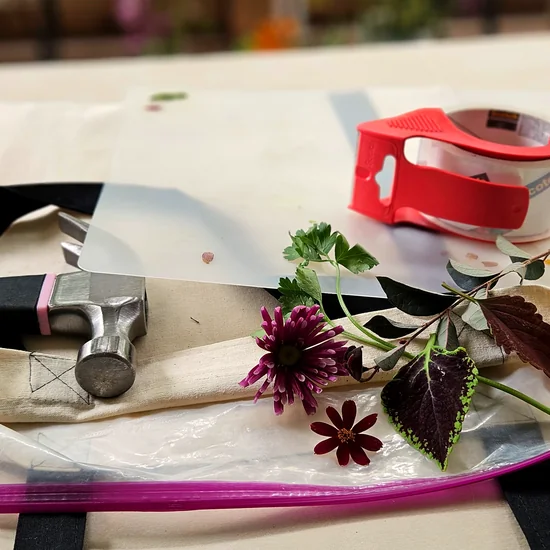
Module 2: home pounding station with hammer, clear cutting board, packing tape, ziplock bag, and fresh flowers on a tote

Module 2

Prepping Your Fabric & Getting Ready to Print

Set up your pounding station with tools you already own. Almost everything on this list comes straight from your kitchen and garage.

  • The full setup: a thick old cutting board, a 16-ounce hammer, packing tape, scissors, parchment paper, and a clothing iron
  • The two-cutting-board trick: a thin board inside the tote so pigment never bleeds through, and a clear board on top so you can see exactly where you're pounding
  • Why you must start with a plain tote, straight out of the package (and why colored totes betray you in the wash)
  • The watercolor paper test that shows you what any plant will do before it touches your fabric
  • The old-shirt trick Kristi used before she found her clear board, and why it still works great
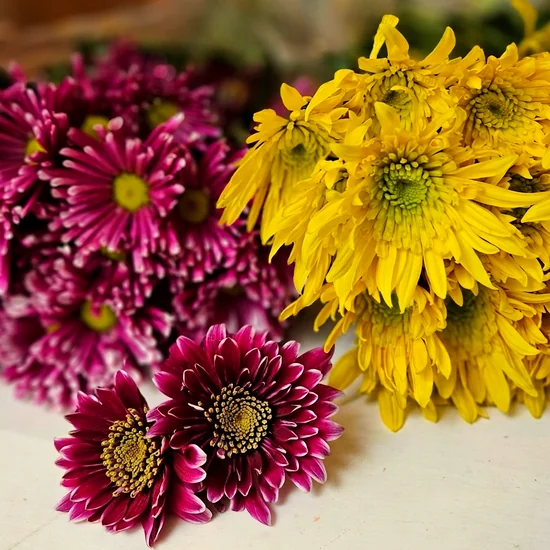
Module 3: fresh magenta and yellow mums piled on the worktable, ready for printing

Module 3

Choosing & Prepping Botanicals

A guided tour of the plant table: which flowers are packed with pigment, which herbs leave the finest detail, and which plants will surprise you.

  • Cosmos and coreopsis, the pigment-loaded summer classics that flower pounders build entire designs around
  • The grocery store lineup that prints year-round: dill, rosemary, mint, chives, flat leaf parsley, thyme, marjoram, and basil (the whole basil plant prints, buds and all)
  • Backyard surprises: Rose of Sharon, Joe Pye weed, and the common landscape bush whose new leaves print purple while its older leaves print green
  • Coleus, the garden-center staple with the widest color range on the table
  • The experimenter's mindset: watch Theresa and Kristi test brand-new plants on camera, because trying things is the fun part
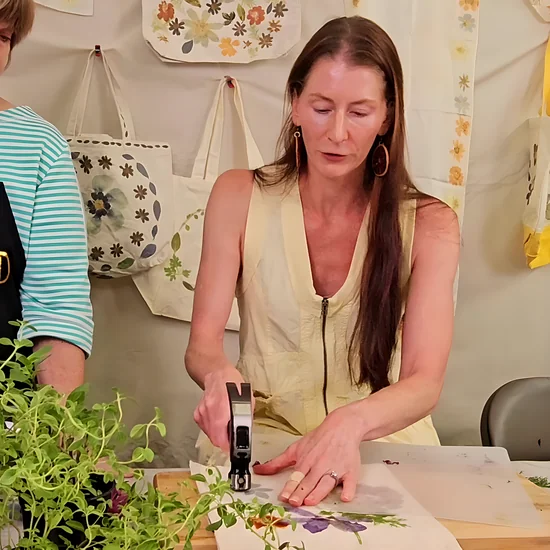
Module 4: Kristi hammering flowers into a tote bag on a cutting board while Theresa watches

Module 4

Your First Tataki-Zome

The heart of the workshop: a full, real-time pounding session where Kristi builds a bag print by print while Theresa coaches from the side. Follow along swing for swing.

  • The edges-first hammering pattern that captures every petal edge and leaf vein instead of flattening your flower into a blob
  • How to tape a flower face-down, settle its petals, and work around each one so the shape survives the hammer
  • Juicy versus firm: why a cosmos center gets a gentle tap, why mature rose leaves need extra force, and how to keep splatter off your design
  • Peeling the print: why it behaves like wet paint, when to reach for tweezers, and when to walk away and let it dry first
  • Building a brand-new flower out of individual petals, working around seams and gussets, and the white cosmos that surprises everyone by printing green
  • The golden rule of your first bag: experiment first, design later
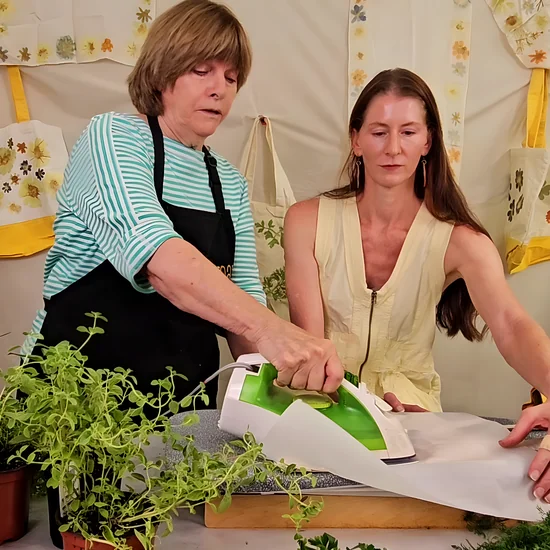
Module 5: Theresa heat-setting a printed tote with a clothing iron and parchment paper

Module 5

Setting & Preserving Your Print

Lock your prints into the fabric with a regular clothing iron, then learn the short cure that makes your bag machine-wash safe.

  • The heat-set routine: parchment paper on top, steam off, about ten seconds per area, two to three minutes for the whole bag
  • The cure window: give the bag 24 hours minimum (a week is better) before its first trip through the washing machine
  • The washing machine test, shown on camera: which prints held strong, and the charming "distressed" look the parsley took on
  • The optional alum mordant step for when you graduate to bigger pieces, and why this simple salt is nothing to be nervous about
  • What to do when prints soften with washing: hammer fresh flowers right over them, and the bag slowly builds into a layered, three-dimensional piece

2 Free Bonuses (Included Today)

FREE BONUS Bonus 1: Kristi showing the dress shirt she has pounded, washed, and pounded again

$27 Value. Yours FREE

The Living Piece: Reviving & Refreshing Your Print

Kristi's favorite canvas is an old dress shirt her husband handed her. She pounded it, washed it, and pounded it again, and it keeps getting better. This bonus lesson shows you how to treat everything you make as a living piece.

  • How washing softens prints into muted watercolor tones, and how a fresh round of pounding wakes the piece right back up
  • Layering new prints over old ones so your favorite piece gains depth season after season instead of wearing out
  • Simple embellishment ideas straight from the instructors: flower buttons, embroidery around your favorite prints, and outlining with a fine fabric pen
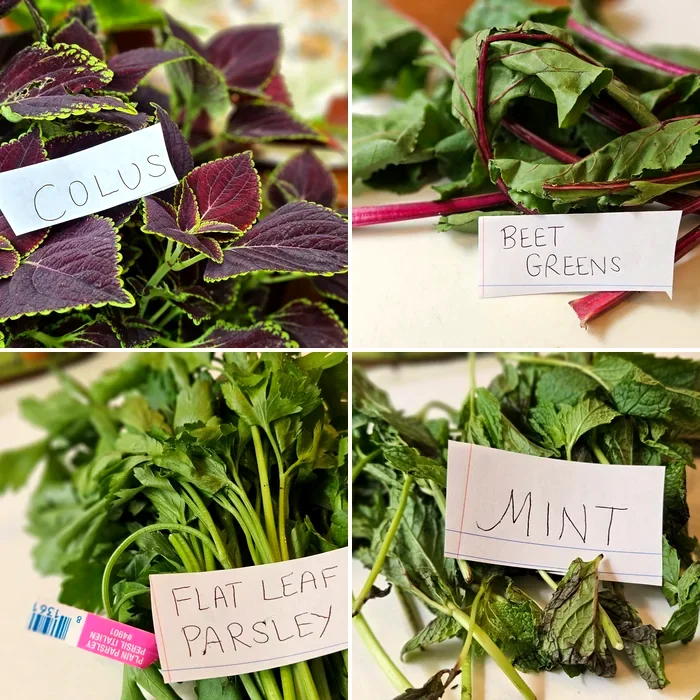
FREE BONUS Bonus 2: labeled bundles of coleus, beet greens, flat leaf parsley, and mint ready for printing

$37 Value. Yours FREE

Botanical Reference: 50 Plants That Work

A printable field guide to what's worth pounding. Fifty flowers, herbs, greens, and foliage plants that print on fabric, with notes on what each one gives you.

  • Which flowers deliver the boldest color (pansies punch far above their size, and bachelor's button is one of the few true blues)
  • Produce-aisle secrets: beet stems give one of the best magentas available, and rainbow chard prints vivid red and yellow
  • The safety notes: which plants are edible and kid-safe for little helpers, and which ones to keep for the grown-ups

For Just $47 You Get Everything

The Japanese Pound Dyeing Ecoprint Workshop course preview across laptop, tablet, and phone
  • The Complete Japanese Pound Dyeing Ecoprint Workshop (5 video lessons) $97 value
  • Printable Supplies Checklist Included
  • Bonus: The Living Piece video lesson $27 value, FREE
  • Bonus: Botanical Reference: 50 Plants That Work $37 value, FREE
Total Value: $161
You Pay: $47

ONE-TIME PURCHASE. LIFETIME ACCESS FOREVER.

Pound Your First Botanical Tote Now

One-time purchase. Lifetime access. Start this afternoon with flowers from your own backyard.

🔒 Secure Payment 256-bit SSL 30-Day Guarantee PayPal Visa / MasterCard
30-DAY GUARANTEE

30-Day Money Back Guarantee

You don't have to make the final decision now. Get instant access today and pound a practice bag this weekend. If at any point in the next 30 days you decide this craft isn't for you, send us one email and your money comes back within 24 hours. We won't ask what happened, and there's no form to fill out. You're only trying it.

Frequently Asked Questions

It begins the moment your purchase goes through. Every lesson and both bonuses land in your account immediately, fully pre-recorded, so you can watch on your own schedule and rewatch as often as you like. There is no cohort to keep up with and no finish-by date. Set it down for a month and pick it right back up.

If you can gently swing a hammer, you already have every physical skill this requires. The workshop was built for complete beginners, and one of your two instructors was a beginner herself just a couple of years ago. In Module 4 you watch her build a full bag in real time, including the moments where a brand-new plant surprises her.

A pack of plain white cotton tote bags (around ten dollars for a two-pack, and the spare becomes your practice bag), a regular hammer, an old thick cutting board, two thin plastic cutting boards (a ziplock bag or plastic sheet works for the inside one), packing tape, scissors, parchment paper, and a clothing iron you already own. Tweezers and a pad of watercolor paper are nice extras. The flowers and herbs come from your yard, a garden center, or the grocery store. Most students already own nearly everything on the list, and a printable supplies checklist comes with the course so nothing gets forgotten.

A single afternoon covers it. Setting up your board takes a few minutes, the pounding session itself is relaxed, unhurried work, and heat-setting with the iron takes two to three minutes. After that, let the bag rest at least 24 hours (a week is even better) before its first trip through the washing machine. That short cure is what locks the color in for the long haul.

It is hammering, so yes, it has some volume. The instructors' advice: work outside on a picnic table where the sound disperses, or slip on ear protection if you're indoors. And kids are welcome. The craft is suitable for any age that can hold a hammer, and the included botanical reference flags which plants are edible and kid-safe and which ones to keep for the grown-ups.

Not for anything in this workshop. The technique uses no chemicals at all: just the plant, the fabric, the hammer, and a hot iron to set the print. Module 5 also demonstrates an optional alum mordant (a simple salt that dyers have used for thousands of years) for when you graduate to bigger pieces and want even more longevity, but you do not need it to make your totes.

Yes, one payment of $47 and that's the end of it. There is no subscription hiding underneath and no pricier tier being teased later. Everything on this page is yours after a single purchase: the full course, both bonuses, and any updates we add down the road.

You're covered by a 30-day money-back guarantee. If the course isn't what you hoped, for any reason or no reason at all, one email gets you a full refund within 24 hours. Nobody will quiz you about why, and there is no form or phone call standing between you and your money.

For as long as you want it. The course is yours to keep, so you can rewatch the pounding session before every new bag and come back next year when you're ready to try a silk scarf or a sundress hem. It will still be there.

HD video lessons you can stream on any device: phone, tablet, laptop, or desktop. Five focused lessons plus the bonus video, so you can follow along step-by-step at your own table. You also get two downloadable PDFs: the 50-plant Botanical Reference and the printable supplies checklist.

Free videos show someone whacking a flower and holding up the result. This workshop gives you the complete system: the edges-first hammering pattern that keeps petals crisp, how to handle juicy flowers versus firm leaves, the two-board setup that stops bleed-through, the heat-set and cure routine that makes bags machine-washable, and a 50-plant reference so you never waste an afternoon on a plant that won't print. You also watch a complete pounding session from first swing to finished bag, so you can see how hard to hit and what every stage should look like.

Your payment runs through a secure, SSL-encrypted checkout handled by the same processors you already use elsewhere: PayPal, Visa, Mastercard, Discover, and American Express. Your card details never touch our servers, and the 30-day money-back guarantee covers the purchase itself.

If you have a grocery store, you have plants that print. Dill, mint, chives, parsley, basil, and rosemary all come from the herb aisle and print year-round, and the floral section covers your flowers in the off season. The included Botanical Reference lists 50 plants that work, spanning garden flowers, grocery herbs, produce like beet greens and chard, and common landscape foliage. A running theme of Module 3 is how many plants you walk past every day turn out to print beautifully.
Ready to Hammer Your First One-of-a-Kind Botanical Tote?

We filmed this workshop the same way you'll experience the craft: in one afternoon, with flowers cut from the yard and herbs picked up at the grocery store. When a brand-new plant surprised us on camera, we left it in, because the surprises are the best part of this art form. There is no right or wrong here. You pick things, you pound them, and you find out what nature had hiding in its leaves.

The flowers for your first bag are growing in your yard right now, or sitting two aisles into your grocery store. Pick a handful and see what they leave behind.

Theresa & Kristi

ONE-TIME PURCHASE. LIFETIME ACCESS FOREVER.

$161 $47
Pound Your First Botanical Tote Now

One-time purchase. Lifetime access. Start this afternoon with flowers from your own backyard.

🔒 Secure Payment 256-bit SSL 30-Day Guarantee PayPal Visa / MasterCard